


We put a photo mode into MotorStorm: Pacific Rift for a good reason — we think it looks pretty awesome, and the photo mode allows you to capture the best moments and save them so you can show your grand kids long after all your teeth have fallen out.
This blog post tries to teach you how to suck eggs with a few basic photography tips to transform those pictures of cars into works of art.
-
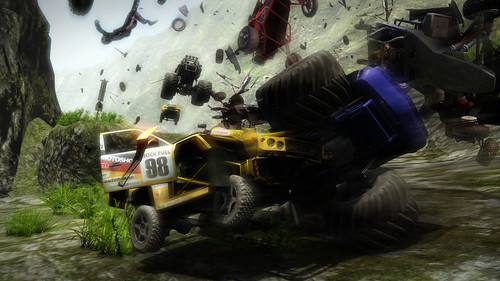
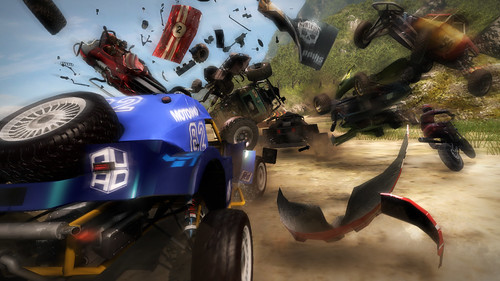
1. Subject and Timing – Sometimes in MotorStorm you’ll want to reach for your trusty Photo Mode because something made you laugh out loud, other times because you think “oooh, purrrrdy…” but in both of these cases and most others, you’ll be looking for action. Action is all about timing, so you need to hit that Pause button and engage Photo Mode at just the right moment. Get this bit right and you can fiddle with the other settings and the try out the tips below to your heart’s content.
2. Framing and composition – This is one of those things that some people find natural, and others need to give it a lot of practice.
You can apply a couple of simple rules to all images that will improve their composition straight off, the main one being the ‘rule of thirds‘, which gives some rough guidelines for how to frame your subject in an image. Centring the subject is rarely the best approach for the sorts of photos you’ll want to be grabbing in MotorStorm — it imparts a very clinical, un-dynamic feel. So, imagine your screen split into nine boxes — groups of these will either frame different areas of the image, or objects in your photo align with their borders — such as the track taking up the bottom third of the frame or a tree cutting vertically a third from the side.
-
3. Dutch tilt – No, not that wobble you get after a hazy afternoon in a Dutch coffee shop, but a photographic technique you can use to very subtle-y change the feel of a shot. By very slightly rotating the lens and so moving the horizon (or at least the axis of the shot) out of alignment with the edges of the image, you can impart a sense of drama onto an otherwise fairly standard looking snap. Just don’t over-cook it — if this effect is the first thing to hit you when looking at the photo, you went too far.
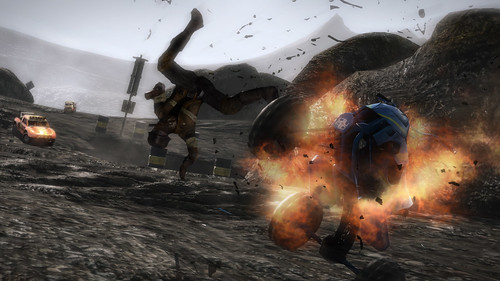
4. Ragdolls – Shots always look good when there’s a ragdoll doing something interesting, whether they are giving the bird to the camera, or flying through the air with their legs akimbo. We prefer the latter.
-
5. Vistas – Much easier than action shots because the timing is not so crucial, the primary focus of a vista shot will be a beautiful environment stretching for miles before you. If you’ve ever tried any traditional panoramic photography, you might be familiar with the concept of ‘stitching’ photos together to make a panorama — just take a load of grabs and make sure you overlap the edges a bit and don’t move or zoom the camera. Since you have complete control of the camera in Photo Mode, it would (in theory, I’ve never tried this!) be possible to produce a seamless 360 degree panorama, print it out massive and paper it all over your bathroom. Then just build a replica buggy out of the bath and you can pretend you live on top of Razorback. Result!
6. Post – Don’t be afraid to throw your photos into your favorite image manipulation program to fine tune and tweak them to your hearts content. Maybe a rogue branch crept into the frame that needs cropping out, the framing is a bit off, or maybe you just think the guy who’s in the process of punching you off your bike needs a makeover. There are a ton of free and commercial applications you could try — we mainly use Photoshop at Evo, but there’s a whole heap of free and shareware offerings for you to flex your artistic muscles.


Comments are closed.
44 Comments
Loading More Comments