

Hi all!
We’ve noticed in the comments that some of you have been requesting more specifics on the gameplay of Metal Gear Solid 4: Guns of the Patriots. Who better to provide that than someone who’s writing the strategy guide? Presenting his top 12 tips for MGS4 is James Price, part of the team at Piggyback finishing up Metal Gear Solid 4: Guns of the Patriots: The Complete Official Guide.
*****

James Price, Piggyback Interactive Limited:
We’ve been playing MGS4 every day for the past ten weeks, and the good news is: we’re still enjoying every minute of it. If we had a dollar for every time that someone on the team has said “Did you see…?” or “Have you tried…?”, we could probably fund Hideo Kojima’s next project, and still have spare change to buy a nice holiday home – like, say, in the Bahamas.
Okay: so that’s perhaps a slight exaggeration. But really, MGS4 has more secrets and subtle features than most games have… well, game.
MGS4 is a game built from the ground up for repeat play. As the story draws to a close, you are awarded with one or more secret emblems that acknowledge (and, in effect, rate) your performance and style of play. Usually, even veteran gamers only unlock one, perhaps two on their initial playthrough. There are a ton of these accolades in total.
Though it contains a handful of situations which have the potential to stop even hardcore players in their tracks (including one audaciously excellent boss fight puzzle), Metal Gear Solid 4 is defined not so much by what you do during play, but what you haven’t done. When you pass through a checkpoint your first reaction often isn’t to focus on what lies ahead, but to reflect on how you could have approached the previous area in a completely different way. MGS4 constantly inspires the question “What if…?” – even as the final credits crawl by, you suspect that you didn’t so much “beat” it as simply reach the end. Precious few games evoke this kind of response, and it’s a big part of what makes Kojima-san’s opus so very special.
Kojima Productions has packed MGS4 with an incredible range of hidden weapons and items, Easter eggs, dialogue sequences, post-game rewards and other such “optional” features. When you take the sheer number of tactical options into account, you realize that many players could reach the conclusion of MGS4 a dozen times, and still not have fully explored the possibilities on offer. There are gadgets and weapons that a player might completely neglect to try out (or, indeed, find), even after twenty or thirty hours of play; later, using some of them is a revelation as you realize the new strategic options they offer. Others are just fun, pure and simple.
In the meantime, check out these 12 exclusive tips to get you started with your own tactical espionage action:
1. Life Gauge
Keeping the Life Gauge topped up is vital, but it’s just as important not to panic and keep filling the gauge unnecessarily with precious items. Though you can replenish it with healing objects such as Rations and Noodles, you should take care not to waste them – especially on higher difficulty levels. Using a Ration when Snake’s Life Gauge is 80% full, for example, is plain foolish. You usually don’t need to even think about refilling the gauge until it drops below 25%. During boss fights or difficult skirmishes, you should instead equip Rations, Noodles or Regain and position them as an “active” item. Once Snake’s health reaches zero, these will be automatically used until your stocks are exhausted.
One other method of restoring Snake’s health is simply to find a safe hiding place and let him stand still. After a few seconds the Life Gauge will slowly start to creep back up. If you crouch or go prone, it will refill more quickly. If you have good cover, you’ll find that this even works during boss battles. This can be a great way of refilling your Life Gauge for free – essential when playing on a high difficulty level. Note that recovery speed depends on the condition of Snake’s other main gauge, the Psyche Gauge; the higher the Psyche Gauge, the quicker the Life Gauge refills. (Incidentally, if you have an extended break from playing MGS4 that lasts for more than 24 hours, you may notice that Snake’s Life and Psyche gauges are refilled by 20% per day. It’s hardly necessary, but a nice touch nonetheless.)
2. Psyche Gauge
The Psyche Gauge is situated directly below the Life Gauge, appearing as four separate blocks. This represents Snake’s psychological wellbeing, which has a direct effect on his performance. Essentially, the more stressed Snake is, the less effective he becomes. Keeping him as calm and focused as possible should be your main goal in terms of managing this meter. The Psyche Gauge can be refilled with certain healing items, such as Noodles; dedicated Psyche-related objects such as the Compress do not directly refill the gauge, but instead temporarily increase the speed at which it is replenished. Cigs can also be equipped to regain Psyche, but to the detriment of the Life Gauge.
As with the Life Gauge, the Psyche Gauge can also be refilled simply by staying still, and more quickly by crouching or going prone. The better Snake feels generally (not too cold, hot, wet, dirty, or overloaded) the faster his Psyche will replenish. You can tell when he’s not feeling great by observing his behavior or murmurs of discontent – if he starts feeling his age, it’s usually a direct sign that something is wrong. Finding solutions to assuage these symptoms is usually just a matter of common sense. If Snake is freezing in cold water for instance, get him out of there; if he’s overheating in direct sunlight, find some shade where he can cool down. One of the major effects of a low Psyche Gauge is that it will severely hamper Snake’s ability to aim accurately. The more stressed and hyped up he is, the more his aim will be impaired; this can have a particularly detrimental effect when he’s using a sniper rifle. Try using a scope when Snake is overanxious and you’ll see how his unsteady hands make it thoroughly difficult to make a clean headshot. The Pentazemin item can be used to temporarily improve his marksmanship when required, but preventative maintenance is always better.
3. Stress Level & Combat High
The Psyche Gauge is affected by, which is depicted by a number that appears underneath it. If Snake is sweltering in a hot, evil-smelling location, or alternatively shivering in a freezing location, his Stress level will rise. He will also become stressed if his equipment is too heavy (over 70 kg), or during an Alert phase. When Snake’s Stress level exceeds 50%, the display will turn red and he will begin to lose Psyche. As his Stress rating continues to increase, his Psyche will diminish at a great rate. However, as long Snake is not experiencing a Combat High, his Stress level can only reach a maximum of 80%.
A Combat High will kick in if Snake shoots with a gun more than 100 times during the Alert phase. Notification that he is currently experiencing a Combat High will appear next to the Life Gauge. During this enhanced state, Psyche does not decrease, and any damage caused by enemies is halved. But it’s not all good news: during a Combat High, Snake’s Stress level can shoot up as far as 100%. It’s a short-term boon, but the repercussions can be painful.
4. Choosing your Equipment: Weapons
When it comes to selecting weapons, you have two important choices to make – which five weapons you have available by pressing the R2 button (which you decide in the pause menu), and which one of these five weapons you will actually wield (which you decide in the weapons window). Your chosen five should always be balanced. A good configuration would be to have a silenced weapon, a powerful submachine gun for close-range action, a sniper rifle, a grenade type, and one diversionary item such as an empty Magazine. The weapon you actually hold should obviously always reflect your immediate needs.
There are many ways to obtain new weapons or ammo. The most obvious is to search for “hidden” collectibles and pick up weapons from the battlefield, but you can also search corpses or pay a visit to Drebin’s Shop.
5. Choosing your Equipment: Items
As with weapons, you have two important choices to make here: which eight items you will have available to you by pressing the L2 button (which you decide in the pause menu), and which one of these eight you actually use (which you decide in the items window). The eight that you choose should also be balanced, although this decision is less critical than with weapons. However, the one “active” item you opt for is very important. At first, you will probably tend to equip the Solid Eye most of the time, because it gives you a better understanding of your surroundings. As you eventually acquire the knack of using the Threat Ring instead of the Solid Eye, though, you’ll soon be able to free up the item slot for something else – such as a Ration during boss fights.
To obtain new items, you can either pick up any that you find (as shown on the maps in this guide) or search bodies. You can’t buy any from Drebin so take great care not to waste anything (especially healing items such as Rations).
Items and weapons in the game have a weight stat. If the burden of Snake’s load (five weapons and eight items) exceeds 70 kg, his Stress will increase, thus reducing his Psyche and overall effectiveness. Just be sensible when it comes to weight distribution, and make sure you compensate for particularly heavy objects with at least a light one if you notice that you are approaching the 70 kg mark. This is generally only a danger when preparing Snake for a boss fight, as there’s a natural tendency to bring out rocket launchers and the like for such occasions.
7. The Solid Eye
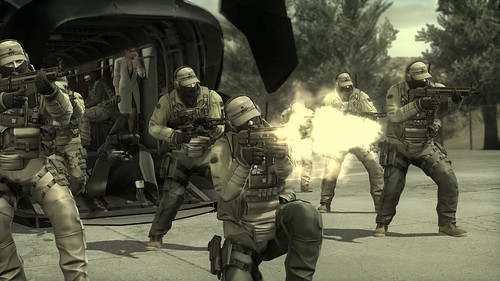
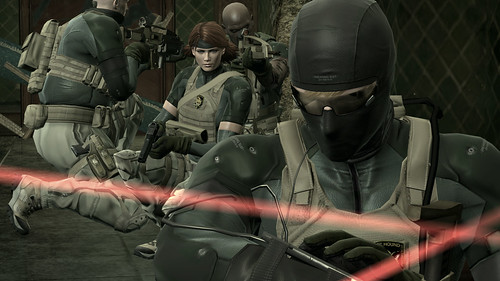
When you first obtain this item, you’ll find life in the field infinitely easier if you keep the Solid Eye selected in your items window most of the time. This gadget, which enables the Baseline Map radar function when active, has three modes: Normal, NV and Binos. When selected, the Solid Eye will display basic data for both enemies and allies, such as which faction they belong to. As it can be too easy to accidentally open fire on your allies during a hectic firefight, this information can be decisive. You’ll find that “friendlies” are much less likely to help you if you start spraying lead indiscriminately, and they may even turn on you if suitably provoked. The information shown is color-coded. Gold, the default color, denotes a neutral character, blue indicates an ally, and red signals an enemy. The Solid Eye is also invaluable in helping you locate hard-to-spot collectable items, as it increases their visibility by placing a digital frame around them.

The Solid Eye additionally has an intuitive radar system, which translates the vibes that Snake picks up from enemies, including sound and movement. It shows the relative location of all targets around you, but keep in mind that it also detects animals – which can be rather disconcerting if you’re in location filled with rats, for example. The NV or Night Vision mode is a special goggle that enables you to see more clearly in dark areas, as well as spot hidden items more easily. Scanning a dark room with NV active is sometimes the quickest way to assess its contents. If you wish to zoom in to view a distant point, simply select the Binos option, and then press up or down on the directional pad.
8. The OctoCamo
Snake’s OctoCamo system goes way beyond the camouflage system found in Metal Gear Solid 3, and has several different modes. In Automatic mode (generally speaking, the most effective), it enables Snake to blend in with the textures and colors of his surroundings. In order to enjoy the functionality of Automatic mode, Snake must either be prone or pressed up against a wall and remain motionless. After a short pause, you will notice his suit change to match his surroundings; a sound effect accompanies this process. If you check the Baseline Map in the top right-hand corner, you will see Snake’s Camo percentage increase as the transformation takes place.
In Manual mode, you choose one specific camo pattern for Snake that doesn’t automatically adapt itself to the environment. This is only really effective if you are prepared to alter it as Snake’s surroundings change, and is also limited to “memorized” surfaces and terrains that have been previously stored.
9. The Threat Ring
The Threat Ring is a translucent circle that appears around Snake’s body when he crawls or crouches during a few seconds. The best way to explain its function would be to describe it as Snake’s “intuition”: it indicates the presence of any people, creatures or active objects (such as vehicles) within Snake’s immediate vicinity. Any such dangers are represented visually by waves that correspond with the position of each potential threat.
The higher the “wave”, the closer (and, sometimes, larger) it is. For example, a soldier that is standing some way away from Snake will only appear as a faint bump in the ring, while multiple enemies standing close by will cause the Threat Ring to undulate like a digitized Rocky Mountains. It’s a brilliantly instinctive way of instantly assessing Snake’s current situation. Once you get to grips with it, you’ll find that the Threat Ring can be just as reliable as the Solid Eye in terms of enemy detection.
The Threat Ring stays permanently active whenever you crawl, or when you crouch-walk at the slowest speed. If you stand up, move at a faster pace, or ready a weapon, it will immediately disappear. Its efficiency is governed by Snake’s current Psyche level: the lower the gauge gets, the smaller and more difficult to “read” the Threat Ring becomes.
10. The Metal Gear Mk. II
Metal Gear Mk. II is a mobile terminal that can be selected from the Items menu and controlled manually. Use the left analog stick to move it around, but don’t forget to activate its stealth camo function with the X button if there are potential aggressors nearby. This ensures that Mk. II is hidden from the naked eye, though it can still be detected by infrared sensors. Use Mk. II to remotely reconnoiter areas while Snake lies low, or even have it knock out isolated soldiers with its electric shock device by holding the L1 button and then pressing the R1 button. You can also press the Triangle button while controlling the robot to perform a variety of context-sensitive actions, such as disarming traps, knocking on walls to distract enemies, and flicking light switches. When you’re done, tap the L2 button or change to a different item to return control to Snake.
Mk. II may not be big enough to wreak havoc in the manner of its much larger namesake, but never less than useful – especially if you favor stealth over direct confrontation. It’s also invaluable during the Mission Briefing cutscenes at the start of each Act, where you can control it to explore the Nomad and collect hidden items. It’s also handy for exploring ventilation shafts, removing the need for Snake to crawl laboriously for minutes at a time.
However, the use of Mk. II is not without drawbacks. The most important thing to remember is that Snake is vulnerable to discovery and sneak attack while piloting it. Secondly, Mk. II consumes battery power at a voracious rate, particularly when its stealth functionality is active. Finally, the device has a limited range, so it’s not possible to use it to explore large areas unless you regularly reposition Snake.
11. The Art of Stealth
It can’t be emphasized enough; stealth is the key to success in MGS4, just as it was in all previous installments. Certainly there will be times when direct aggression is best or unavoidable – especially in your first playthrough – but for the most part it’s vital that you learn the art of sneaking. How you move and the stance you adopt is of paramount importance. Though there will be occasions when it’s safe for you to run upright without a care in the world, you’ll usually find that it’s best to adopt either the crouch-walk or crawl stance. Bear in mind, though, that you’re far from immune to detection when crouch-walking – it can still be rather noisy, with the reduced Camo rating reflecting Snake’s increased visibility.
Trust your senses and let your ears be your guide. If you can hear Snake pattering across a wooden floor, then so can the enemy. Slow it down, and above all be patient. Crawling is always more effective than crouching in stealth situations. With your body flattened to the floor, making regular pauses to enable the OctoCamo to adapt to new surfaces, you can easily maintain a Camo rating in excess of 65%, even while moving. On the downside, you’re slower to react when crawling on your belly, especially if you’re attacked from close range.
Observation of the enemy is another key aspect of effective sneaking. It won’t matter in the slightest how quiet you are if you inadvertently stumble directly into the path of a patrolling soldier. Take time to observe the enemy’s patterns of movement from behind cover. Careful observation should enable you to figure out when to move and when to stay put. Whether you wish to use this information to bring targets down silently, or merely sneak past when their back is turned, is entirely up to you. It’s also prudent to make use of the gadgets and objects at your disposal. For example, Metal Gear Mk. II is a vital tool for scouting an area without attracting unnecessary attention.
As far as weapons are concerned, nothing arouses the attention and ire of surrounding troops like a deafening hail of machine gun fire. It’s no good diligently crawling with care in full camouflage gear, only to bring the enemy swarming to your position with an ill-judged salvo of bullets. Use of silenced weapons or CQC is absolutely essential. One well-aimed headshot or smoothly-executed CQC attack will fell your quarry instantly and silently, but botched attacks or poor marksmanship can give your target the chance to call for help. A headshot is also more potent with anesthetic weapons – it generally results in a swift takedown, with enemies losing consciousness instantly.
Your Solid Eye’s Night Vision function can be extremely effective when it comes to tracking enemy movements, as it reveals the footprints left by patrolling guards. Don’t overuse NV, though, as it actually emits a low noise while active, and may alert a sharp-eared soldier.
12. Maximizing Battle Efficiency
“Efficiency” actually depends on what your goals are. Naturally, if you’re trying to achieve a no-kill playthrough, you won’t have the same priorities as when your bloodlust dictates that you shoot everyone and everything in sight. But overall, the following tips are true in most instances.
- Aiming for the head works a treat (headshots usually result in instant death/unconsciousness, or increased damage on bosses).
- Using upgraded weapons (scopes, red dots, et al) makes you more accurate and effective.
- When surrounded, activate Auto Aim mode to quickly eliminate all enemies (change targets by pressing left or right on the right analog stick). This is less effective on higher difficulty settings, though.
- Choosing the right location is important. For example, a high vantage point works best if you are sniping, it pays to operate from a defensible position during combat, and picking a secluded spot to silently take down a target is always sensible.
- Press the R3 button to turn Snake to face the camera direction. This even works when he’s lying down or manning a turret.
- Make sure militia/rebel fighters are friendly to you by helping them out as much as possible during battles, especially when they ask you to. Make a point of not aiming at or (however inadvertently) shooting them.
- Never fight if you’re in a weak or dangerous position, especially a location that exposes you to fire from several directions. If in doubt, bolt for cover.
- Always try to eliminate your most dangerous opponents first. Snipers and turret operators should obviously be your principle targets.
- Be sure to reload frequently to avoid the dreaded “dead man’s click”, and have weapons prepared in reserve for more unrelenting assaults.
- Conserve valuable items and ammo, and try to save your most powerful weapons for the strongest targets.

Metal Gear Solid 4: Guns of the Patriots: The Official Guide will be launched on June 12.


Comments are closed.
63 Comments
Loading More Comments